


When executed with skill, under-lashes and inner corner eyelash extensions can dramatically elevate a client’s lash look—yet they’re also among the trickiest zones to master. These areas demand heightened precision, tailored products, and a deep understanding of lash direction and anatomy. So, what’s the key to mastering them? It’s all about strategic isolation, smart product choices, and a steady hand refined through practice.
Overview of Under-Lashes and Inner Corner Eyelash Extensions
Key Differences Between Under-Lashes and Inner Corner Lashes
Under-lashes are applied beneath the lower lash line, while inner corner lashes fill in the sparse or short lashes near the tear duct. Each technique demands specific adhesives, tweezers, and lighting setups.
Stylistically, under-lashes add dramatic fullness from below, while inner corner lashes smooth out the lash line and enhance eye shape subtly.
Importance of Precision in Application
If the eyepatches are placed incorrectly it will be extremely uncomfortable for your client it will also lift up the inner corner lashes, resulting in the wrong distance and an overall messy look when your client opens their eyes.
Benefits of Applying Under-Lashes
Enhancing Lash Density from Below the Lash Line
Under-lashes can create a fuller lash look without weighing down the upper line. By working from below, artists can produce a 360° volumized effect that appears denser without compromising the health or comfort of upper lashes.
Improving Lash Longevity with Bottom Support
Another perk? Under-lashes help balance out upper extensions by evenly distributing visual weight. This optical balance can actually reduce tugging on upper lashes during blinking or rubbing—making your sets last longer.
Common Challenges with Under-Lash Application
Visibility and Access Limitations
Lower lashes are naturally short and harder to isolate. They often blend into the skin tone or point at awkward angles. To combat this, artists rely on magnification glasses or ring lights that provide sharp visibility without shadowing.
Increased Risk of Irritation or Adhesive Contact
Since lower lashes sit close to the waterline, even minor adhesive overflow can lead to irritation. What’s very important is that the eyepatches should never ever be touching the waterline. Proper pad placement—1–2mm below the lower waterline—is crucial to avoid redness or chemical burns.
Step-by-Step Process for Applying Under-Lashes
Preparing the Client for Lower Lash Application
Start with a thorough cleanse using a foam lash shampoo to eliminate oil and residue. Then apply under-eye pads designed for smaller eye shapes. Choose high-quality eye pads that hold the bottom lashes well as well as choose ones that don’t have too many added ingredients that could cause irritations to your client’s eyes.
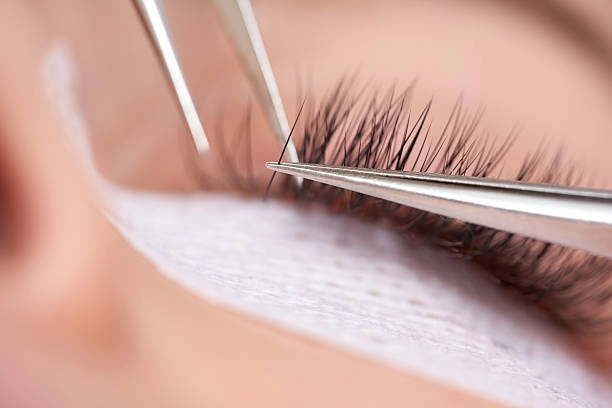
Isolating Individual Lower Lashes Accurately
Use curved isolation tweezers for ergonomic access. Work slowly and consider using a “guide lash” technique if tiny natural lashes keep slipping into your working area.
Attaching Extensions Below the Natural Lash Line
Dip only 2mm of the extension into adhesive and place it just below each natural lash’s base. You want a small coating covering 2mm from the bottom of the lash extension. Angle placement carefully to mimic natural growth.
Ensuring Consistency Along the Lower Lash Line
Maintain spacing consistency and match curl type with natural lash curvature. Soft curls like B or J work well here for a realistic finish.
Final Check for Comfort and Symmetry
Have clients blink slowly while you check for poking or misalignment before adhesive fully cures. Adjust as needed on the spot.
Advantages of Inner Corner Eyelash Extensions
Creating a Seamless Transition Across the Lash Line
Inner corner lashes fill in visual gaps near tear ducts, completing the design without abrupt starts. This area is often overlooked but can dramatically polish your work when done right.
Enhancing Eye Shape with Subtle Accents
Shorter extensions (typically 6–8mm) lift droopy inner corners subtly while maintaining natural elegance. They’re perfect for almond-shaped or close-set eyes needing balance.
Technical Difficulties in Inner Corner Application
Restricted Working Angles Near Tear Ducts
Artists often find their own hands blocking visibility in these tight zones. One quick fix: rotate your client’s head slightly away from your working hand and use angled mirrors or lighting setups to improve clarity.
Sensitivity of Skin Around the Inner Eye Area
The skin here is thin, so tools and adhesives must be handled gently. Adhesive fumes can also irritate quickly—opt for low-fume glue like ESSI LASH’s Gentle Glue with a 2–3s drying time if needed.
Methodical Approach to Inner Corner Lash Extension Application
Mapping Out Ideal Lengths for Inner Corners
Plan ahead using mapping stickers on eyepads to maintain symmetry across both eyes. Stick with shorter lengths that blend effortlessly into natural lashes.
Adjusting Artist Positioning for Better Access
Rotating the client’s head outward gives better reach. Don’t hunch—use posture-friendly equipment like elbow rests or wrist supports if necessary.
Isolating Fragile Inner Lashes with Precision
Use fine-point tweezers designed specifically for tight spaces. Avoid attaching to baby hairs that may not support weight over time.
Minimizing Adhesive Usage in Sensitive Areas
Use micro-dots of adhesive rather than large beads. Let each bond cure slightly longer before moving on to prevent shifting.
Aligning Extensions at Natural Growth Angles
Follow each lash’s growth pattern closely—don’t force a curl direction that doesn’t fit. Even in this case, from the inner corner to the center of the eye should be lashed at a 90-degree angle.
Verifying Retention and Comfort After Placement
Gently brush through to test adhesion. Ask your client if they feel any irritation before moving forward.
Essential Tools and Products for Detailed Application Work
Tweezers Designed for Inner Corners and Lower Lashes
Fine-tipped tweezers help isolate tight spaces; curved application tweezers offer wrist relief during long sessions. ESSI LASH offers premium options tailored for precision zones.
Conditioning Products That Support Lash Health
Use pre-treatment primers and post-application conditioners to support lash flexibility and bonding strength without drying them out.
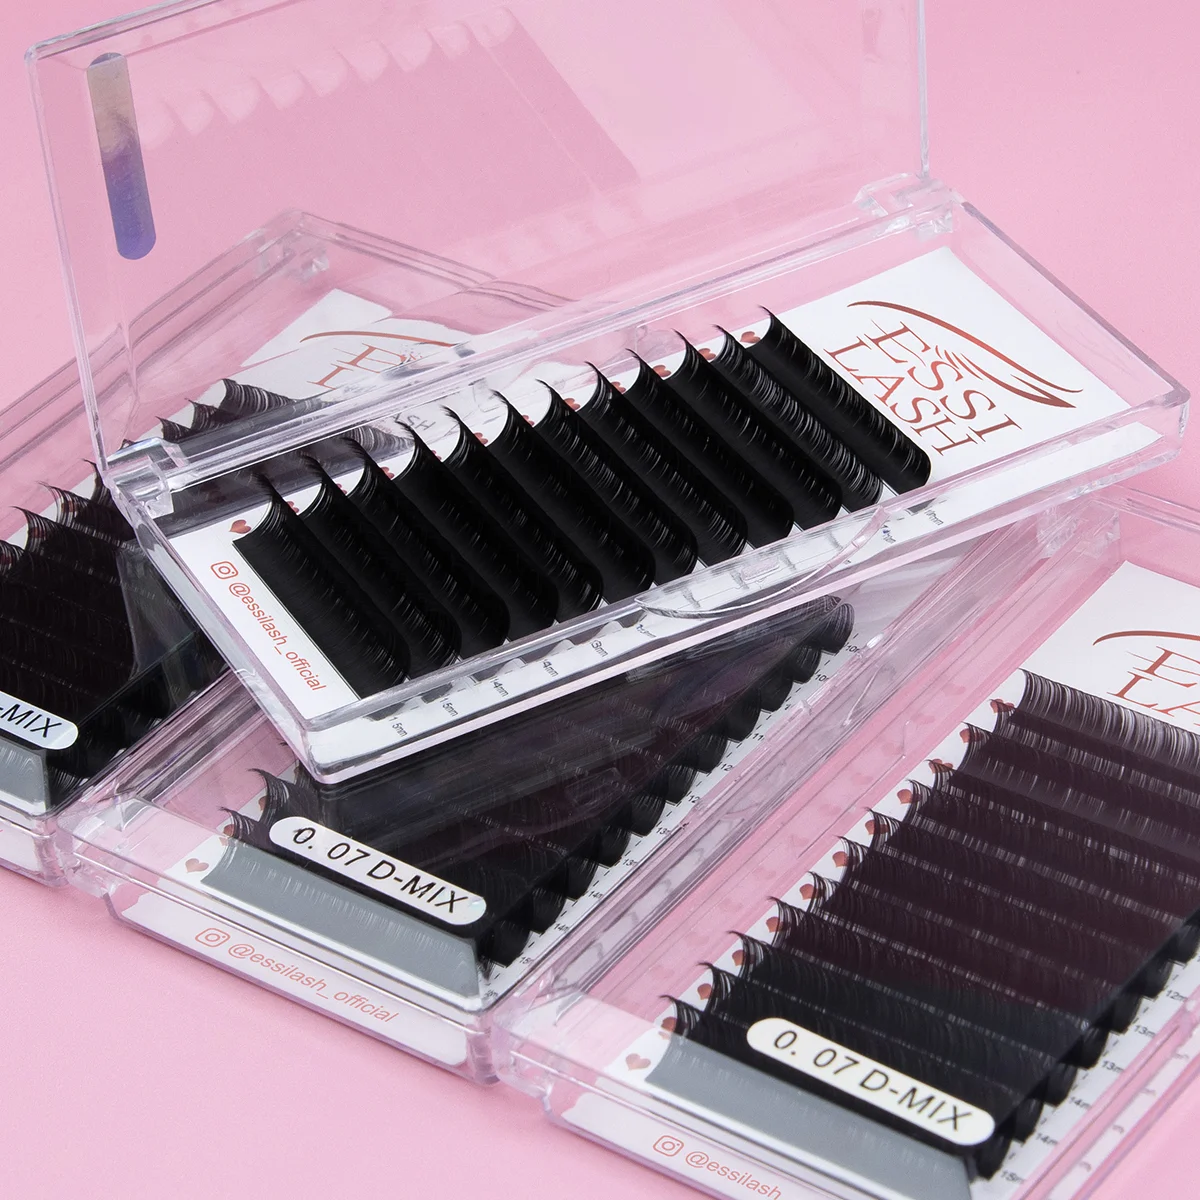
Choosing Lightweight Volume Extensions
0.05 Cashmere Mega Volume lashes are ideal for under-lashing due to softness. For inner corners, go with 0.07 Premium Volume lashes—structured yet light enough to prevent drooping or poking.
Maintenance Tips After Applying Under-Lashes and Inner Corners
Educating Clients on Proper Cleaning Techniques
Recommend oil-free cleansers and demonstrate how to brush extensions gently using microfiber wands—especially crucial for delicate lower and inner zones.
Scheduling Timely Fills Based on Growth Cycles
Lower lashes shed faster than uppers, so clients may need fills every 2–3 weeks. Monitor retention during follow-ups and adjust strategies if signs of early fall-out appear.
Incorporating New Tools into Your Workflow Strategically
Experiment with one new tool or product at a time—like switching to ESSI LASH’s Super Bonder or trying their ultra-soft Cashmere Silk Lashes. Track client feedback after each change to optimize your toolkit.
FAQs
Q1: How long do under-lash extensions typically last?
They usually last around 2–3 weeks due to faster growth cycles on lower lashes.
Q2: What curl type works best for inner corners?
B or J curls are ideal because they follow natural lash angles without poking into tear ducts.
Q3: Can I use volume fans on bottom lashes?
Yes, but only lightweight ones like 0.05MM from ESSI LASH to avoid pulling.
Q4: How do I avoid irritation near the waterline?
Keep pads 1–2mm below the waterline and use low-fume adhesives in sensitive areas.
Q5: What’s an easy way to improve my visibility when working in small areas?
Adjust lighting angles, wear magnifying glasses, and rotate your client’s head slightly away from your working hand.
